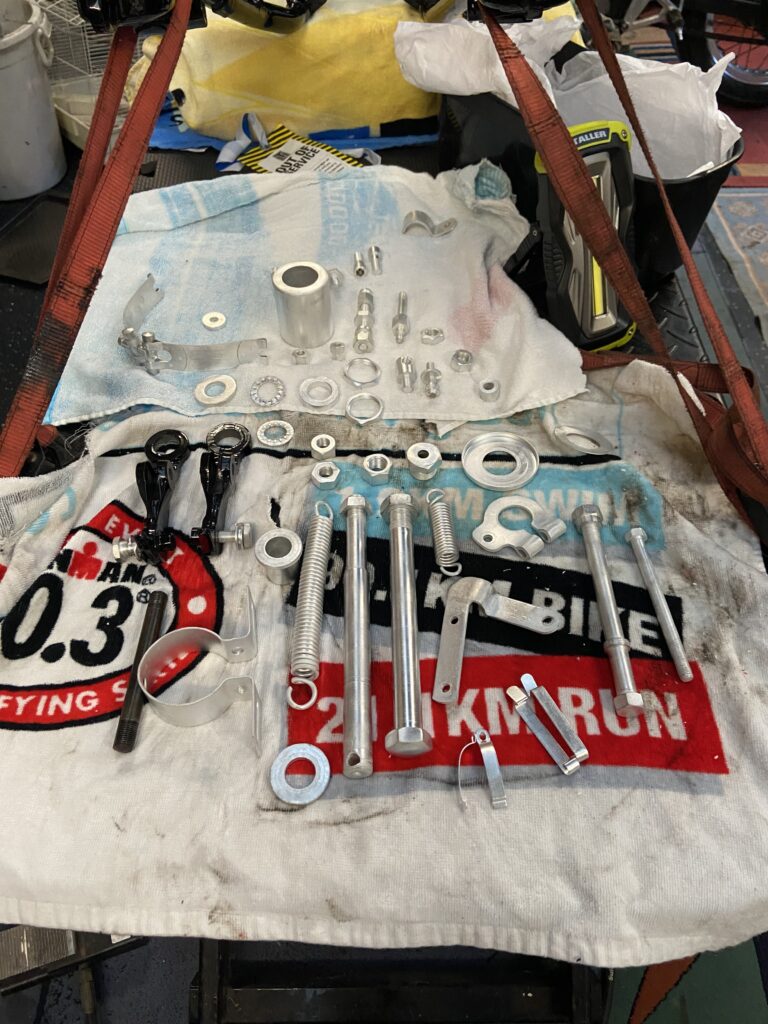
When we left the Square Four project last month, she was about to be reduced to hundreds of pieces. A lot of those pieces necessitated individual decisions on preservation, restoration or substitution. Preservation is good. I use the term here to simply indicate a clean and polish then set the part aside to be reunited with the motorcycle at some later point. Stainless steel, alloy and brass components come immediately to mind. Restoration is more complex. It includes machining, painting and plating. Substitution is a murky swamp with quicksand just below the surface. Your hand can disappear into this mire with a wad of money, only to come out covered in regret.
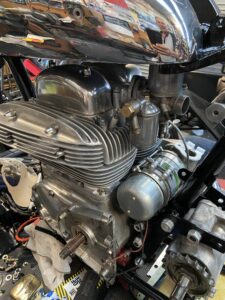
Before we go any further, please note, this is not a treatise on motorcycle restoration, it is an informal collection of loose threads that includes some of the highs and lows of such a project. I’m happy to say the lows were kept to a minimum, due in a large part to the previous owner’s deft mechanical skills, for example, the engine was running sweet and strong so there was no point in pulling it apart this time round. But it did look quite grubby so I was compelled to give it a clean-up. I thought I would use baking soda and give it a blast. That’s mistake number one. Mistake number two was attempting to hose it off with water.

My first attempt at soda-blasting didn’t work out so well.
I’m not sure where I picked up the idea to clean the engine with a soda-blast but the end result was a white compound caked into the most inaccessible parts of the machine. I’d made a hideous mess of it. Fortunately, in the back of my mind I knew the bike would be coming apart and having it covered in the dirty white discharge of Frosty the Snowman only served to hasten the pull down.
The pull down on an old British motorcycle can be a messy affair (primarily as they are known to lose a bit of oil) but, remember, grease and oil preserves metal and whilst having your arms covered in black grime is inconvenient, the motorcycle can be remarkably well preserved below the crusty exterior. An acid-bath and cadmium plating will have even the grimiest fasteners looking like new. Better still, you can replace them with stainless steel.
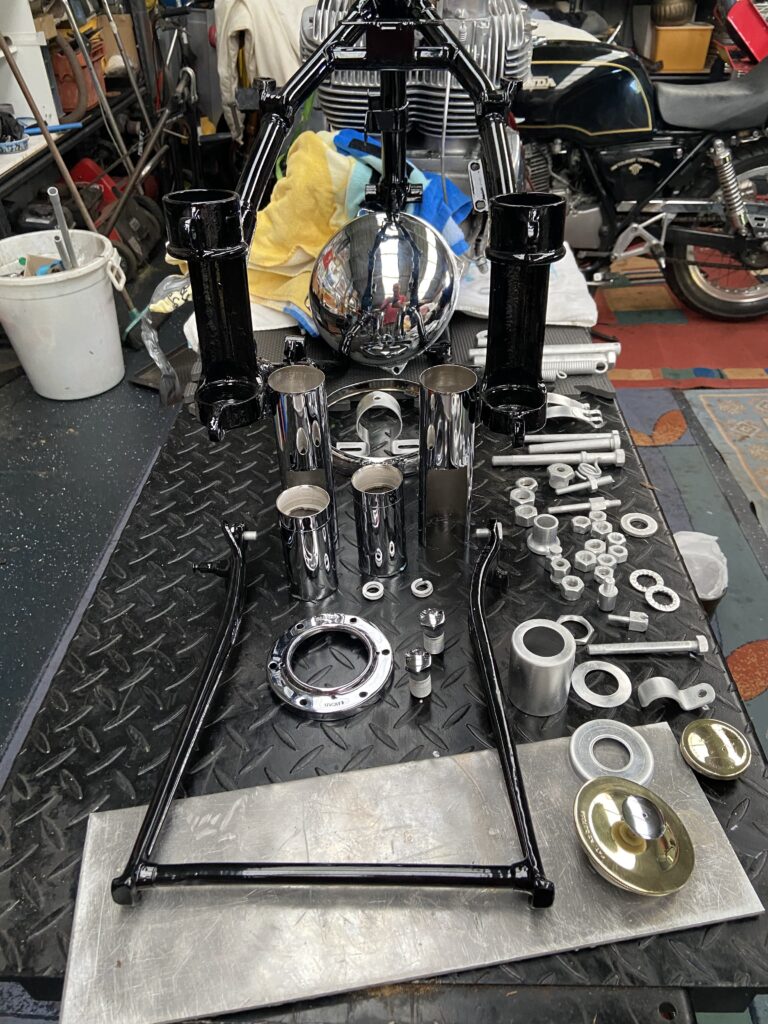
Stainless is an extravagance reserved for the rich or foolish, and I don’t have a great deal of money. There is a lot of hardware at the rear of an Ariel that can be placed by stainless steel. I was introduced to the work of Mr Clay Jones, a UK-based gentleman who owns an Ariel, as did his father before him (sounds familiar). Clay trades under the name of ‘Acme’ stainless steel and writes, “we strongly believe that is not our place to change history and therefore we machine out parts to the correct profile of genuine and original parts we have sourced from and customers over the years” (Acme Stainless). Once you’ve seen Clay’s high-quality pieces fitted to an Ariel it’s hard to contemplate using anything use. Cad-plated steel will not hold the same allure. To this end, I spent and enjoyable evening some 18 months ago loading my virtual shopping cart with an assortment of Clay’s finest machined Ariel parts. I’m happy to say the goods arrived safely in Australia and are now festooned around my motorcycle – it’s the best $1,000 I’ve ever spent on nuts and bolts.
Armour Exhaust and Acme Stainless Steel are two excellent British companies churning out high-quality spares for the motorcycle restoration market.
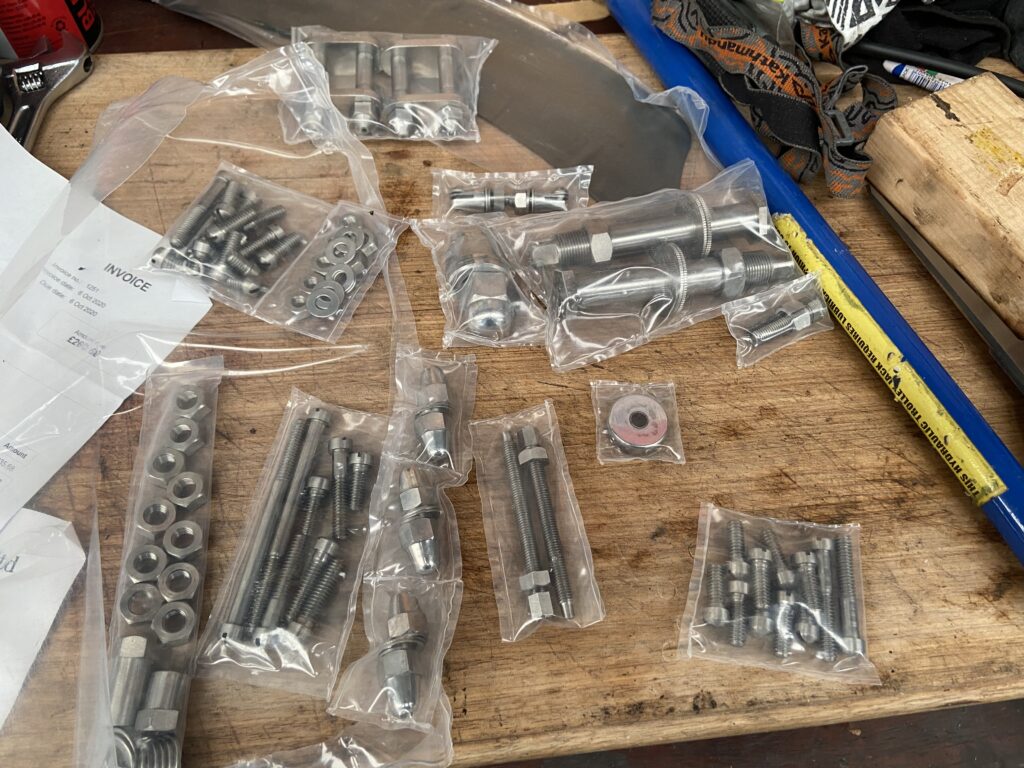
Some of the stainless steel fasteners I received from Acme in the UK. Beautiful stuff.
Speaking of securing UK hardware, there’s some fine specialist manufacturers at work over there. Armour exhaust delivered a complete four into two exhaust system, manufactured and chromed in the UK, to Australia for less than the price of having the old one re-plated here. The work is first-class and fits perfectly. Unlike a lot of the products coming out of India. Which brings me to the Indian product. Reproduced motorcycle parts out of India is a massive industry.
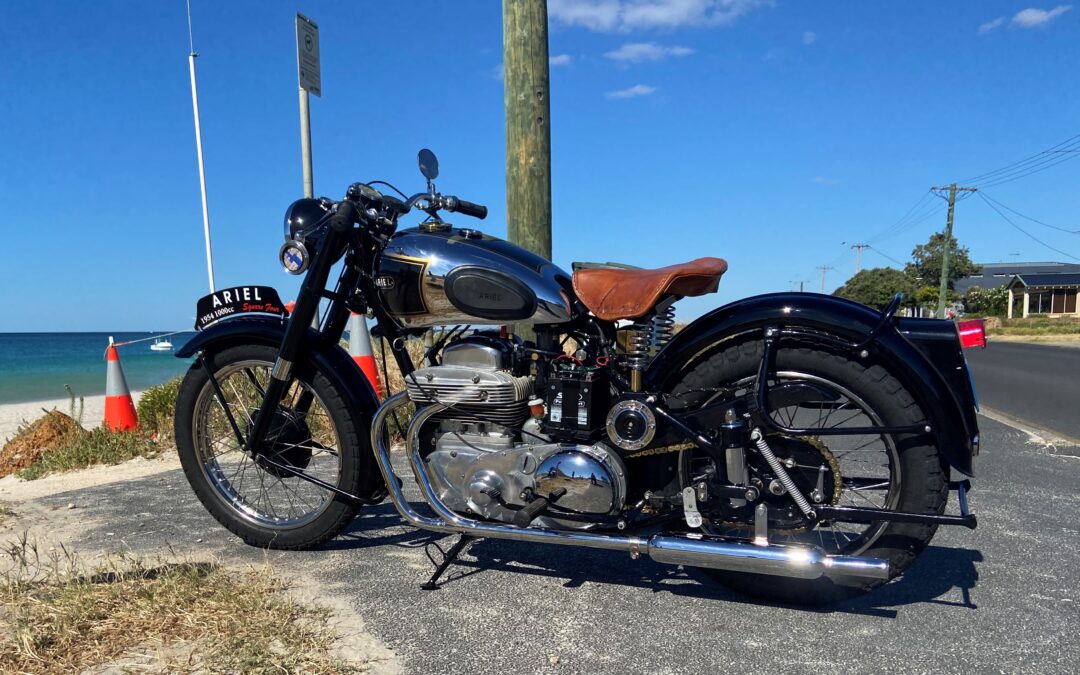
Recall my previous discussion about reverting to a sprung saddle? The accompaniment to that is a fuel tank from the era. The era was paint and chrome with a large brass cap at the top and an oil-pressure gauge holding court in the middle of the tank. The oil-pressure gauge is a particularly nice touch. It begins to bump up the scale with a few prods of the kick-starter. During times of recalcitrance, I can generally get 50 psi out of half a dozen swings on the kick-starter. Ernie had fitted a Repco-style gauge to the handle bar but the modern instrument looked way out of place. However, having lived with the security of an oil-pressure gauge on a vintage motorcycle I really couldn’t live without one, so I sourced a period-correct, Smiths item from Gumtree. Evidently it was out of an old Jag but it looks perfectly at home on the Ariel. Now, back to the tank.
My Indian-made, chromed and painted fuel tank arrived at my door in rural Western Australia for under $500. It’s a very good piece of work.
I had obtained an earlier Ariel fuel tank but it was too far gone, the swamp swallowed $400. I then took another gamble on an Indian tank. This time it paid off and for less than $500 Mumbai’s finest manufacturing has curried favour with Turner’s creation (there goes another mouthful of the purist’s dark ale, all over their computer screen). The chrome and paint are first class but the tank did leak when fuel was added. An epoxy liner has plugged up the leaks and I now have a gleaming chrome tank, with black inserts and gold pinstripe. The polished brass fuel cap sets things off nicely.
By the nineteen fifties, brass was so last year. It was associated with old vehicles so manufacturers went to great lengths to cover it up, lest their product looked old. These days, when I notice there is brass under rusty chrome, I do a happy dance because I know it’s going to add a golden touch to my machine. Ariel fuel caps are a complicated, three-piece, item that is made of brass and looks splendid when stripped of the chrome.
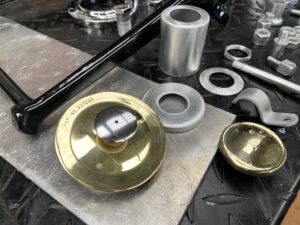
Stripped of chrome, brass shines like gold.
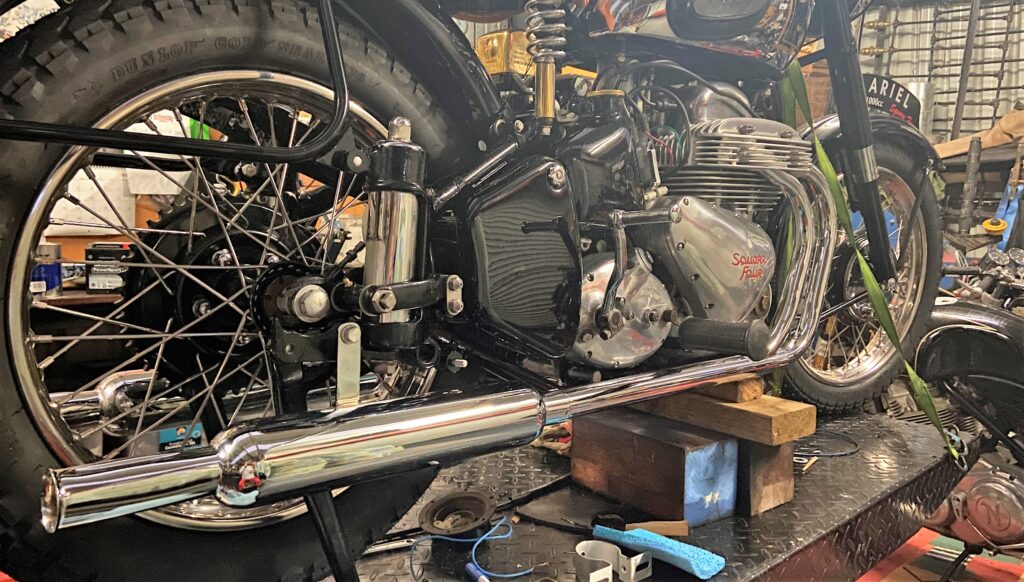
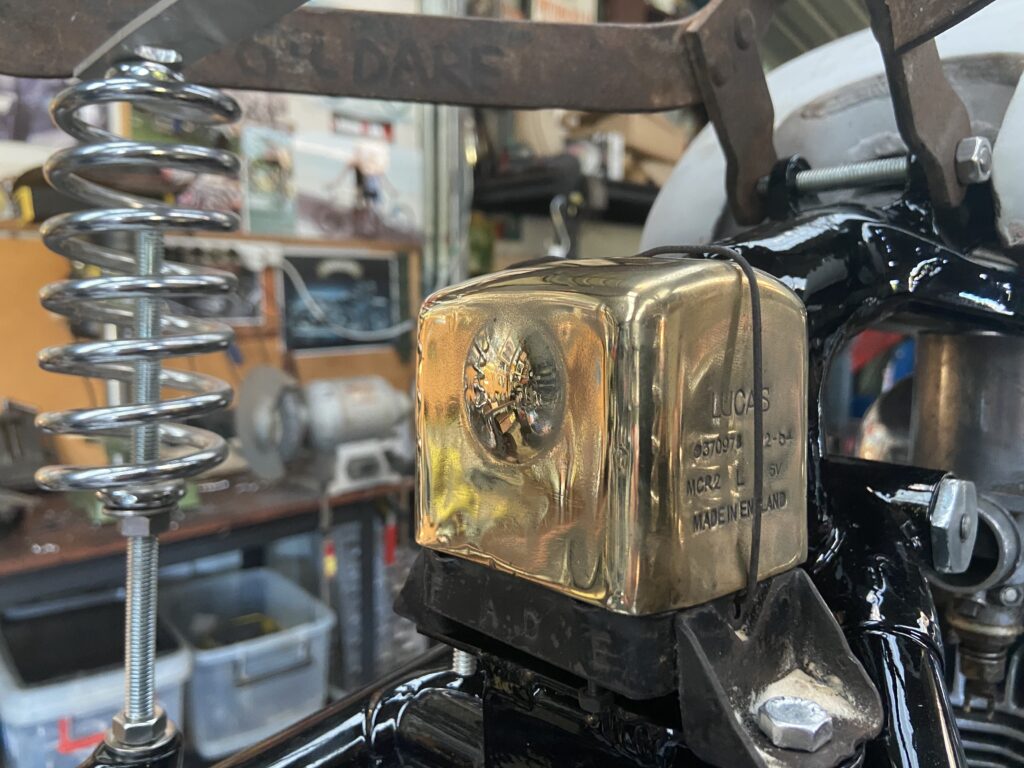
One of the most important things I do when rebuilding a motorcycle is to upgrade the electrical system. The Ariel was no exception. Elsewhere in my shed, Trispark electronic ignition and a modern BTH magneto reside in my Vincent and Triumph respectively. They provide healthy sparks through iridium plugs and give me great peace of mind. In the case of the Ariel, with its Lucas distributor borrowed from an Austin, I was forced to turn to car mechanics for increased reliability. This included changing my old 6-volt system to 12-volts and sending my aging dynamo to England to have the guts changed out for a 12-volt, 300-watt Nippon Denso alternator. There was no replacement unit. One must retain one’s own unit because, in their wisdom, Ariel put the distributor right through the end of the generator. Anyway, Bennet Longman of Iron Horse Restorations does a marvellous conversion and now I have enough electricity to power a small town.
My Iron Horse alternator conversion in situ. Note the provision for the distributor drive at the right side of the unit.
Bennet asserts a lower kick speed will fire up the engine and, once running, the alternator will balance the charge of the ignition system and modern 12v headlamp bulb at around 25mph. He also bench-tests each unit before it is returned. Back home, during an early test run, and having muddled up the wiring, my kill-switch wouldn’t shut the engine down so I disconnected the battery however the bike continued to idle, powered only by the alternator. I’m guessing it will balance the charge system from the get go.
Another item, which would have been novel in 1954 but not so much these days was the inclusion of an oil filter. I used one that was originally made for a Citroen 2CV. It seems these items are being churned out (again, most likely in India) for use in the motorcycle industry. Back in the eighties I spent some time travelling through Europe with a German in her 2 CV, our lubricant of choice was pilsner (we’ll leave that right there as this is family-friendly forum after all).

The oil-gauge taking centre-stage is a welcome addition to a vintage motorcycle. This one was sourced from an old Jaguar motor car.
Back to mineral oil, and the evolution of the internal combustion engine, Doctor John Ellis, decided crude oil would likely be better at reducing friction than lard, which was the lubricant for most of the 19th century. Dr John was onto something and mineral oil became the saviour of moving parts everywhere. During the early part of the 20th century, dumping oil onto the earth was becoming uncool so engineers started to turn their efforts towards saving and cleaning the engine oil. Oil tanks became a thing and gravity aided in keeping the circulatory system clean with the heavier particles sinking to the bottom.

The oil filter has been borrow from a Citroen 2CV. I’ve tucked it away in the tool box because, after all, who needs tools when you’re riding an Ariel?
Another way of removing contaminants from oil was to centrifugally trap it. Of course, the main centrifuge in an engine is the crankshaft, so early engineers resolved to filter oil in the deepest, hardest to get at part of the engine. To assist mechanics keep these troublesome journals clean, a tube was inserted into the middle of the crankshaft, its sole purpose being to catch particles and grime. These tubes are called sludge traps and they do an excellent job of trapping circulating debris. Eventually, when they’ve caught enough, nothing will get through the journal, oil will cease to flow and the engine will explode, or best case scenario, it will grind to a hault. So here’s a tip. Should you buy an old bike, see if you can find out the state of the sludge trap. My ’56 Thunderbird looked brand new when we got it. Ten years later, I had cause to pull the engine down and a significant amount of sludge was removed from the crankshaft. Disaster averted.
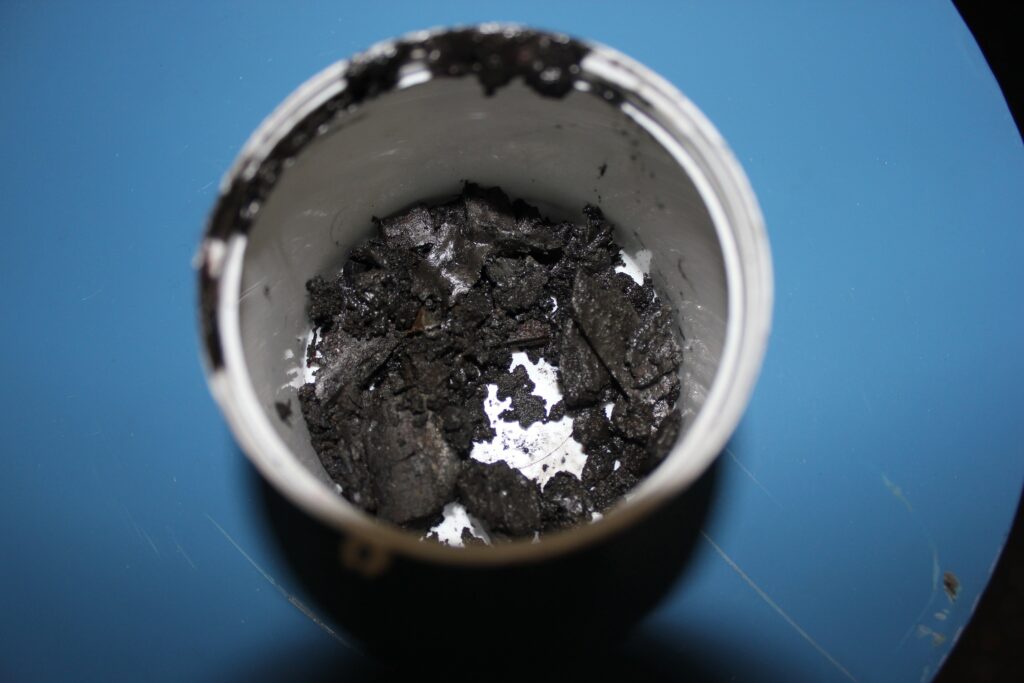
Gunk pulled from the sludge trap in my ’56 Triumph Thunderbird.
The Ariel remains an unknown but I do trust the previous owner’s judgement and hope there’s not too much gunk in the two cranks. In the meantime, I am hoping my nearly fitted oil filter, a powerful new Morgo oil pump and some good quality detergent oil will help clear the plaque from the arteries of the Square 4 engine. For me, a good oil pump is de-rigueur and the best for British motorcycles is the British made Morgo. In 2019 I visited the factory to pick up one of their big-bore kits for a Triumph and I must say I was very impressed with their outfit. The downside is demand often relieves Morgo of stock and you need to go on a wait list until they do another product run. But it is worth it, a good circulatory system is crucial to the wellbeing of multi-cylinder engines, any engine in fact.
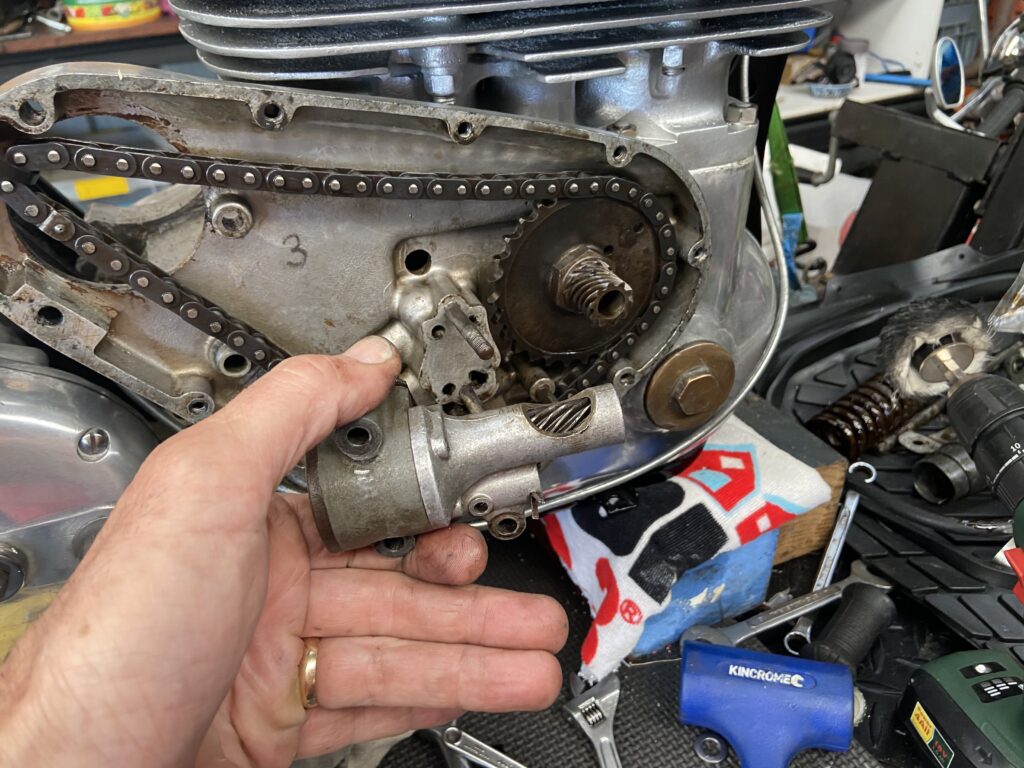
The original Ariel oil pump was removed and replaced with a modern Morgo rotary pump.
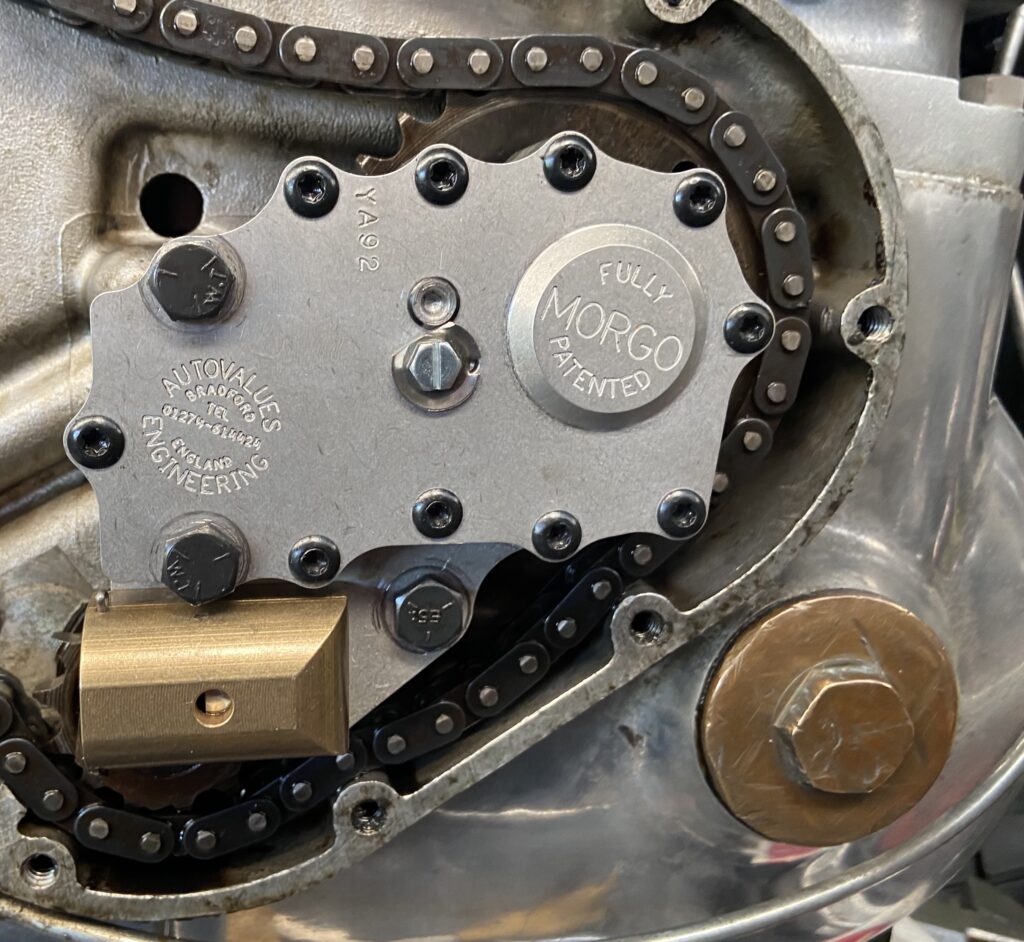
The Morgo rotary oil pump is a modern, reliable piece of equipment that has been used in many machines in my shed.
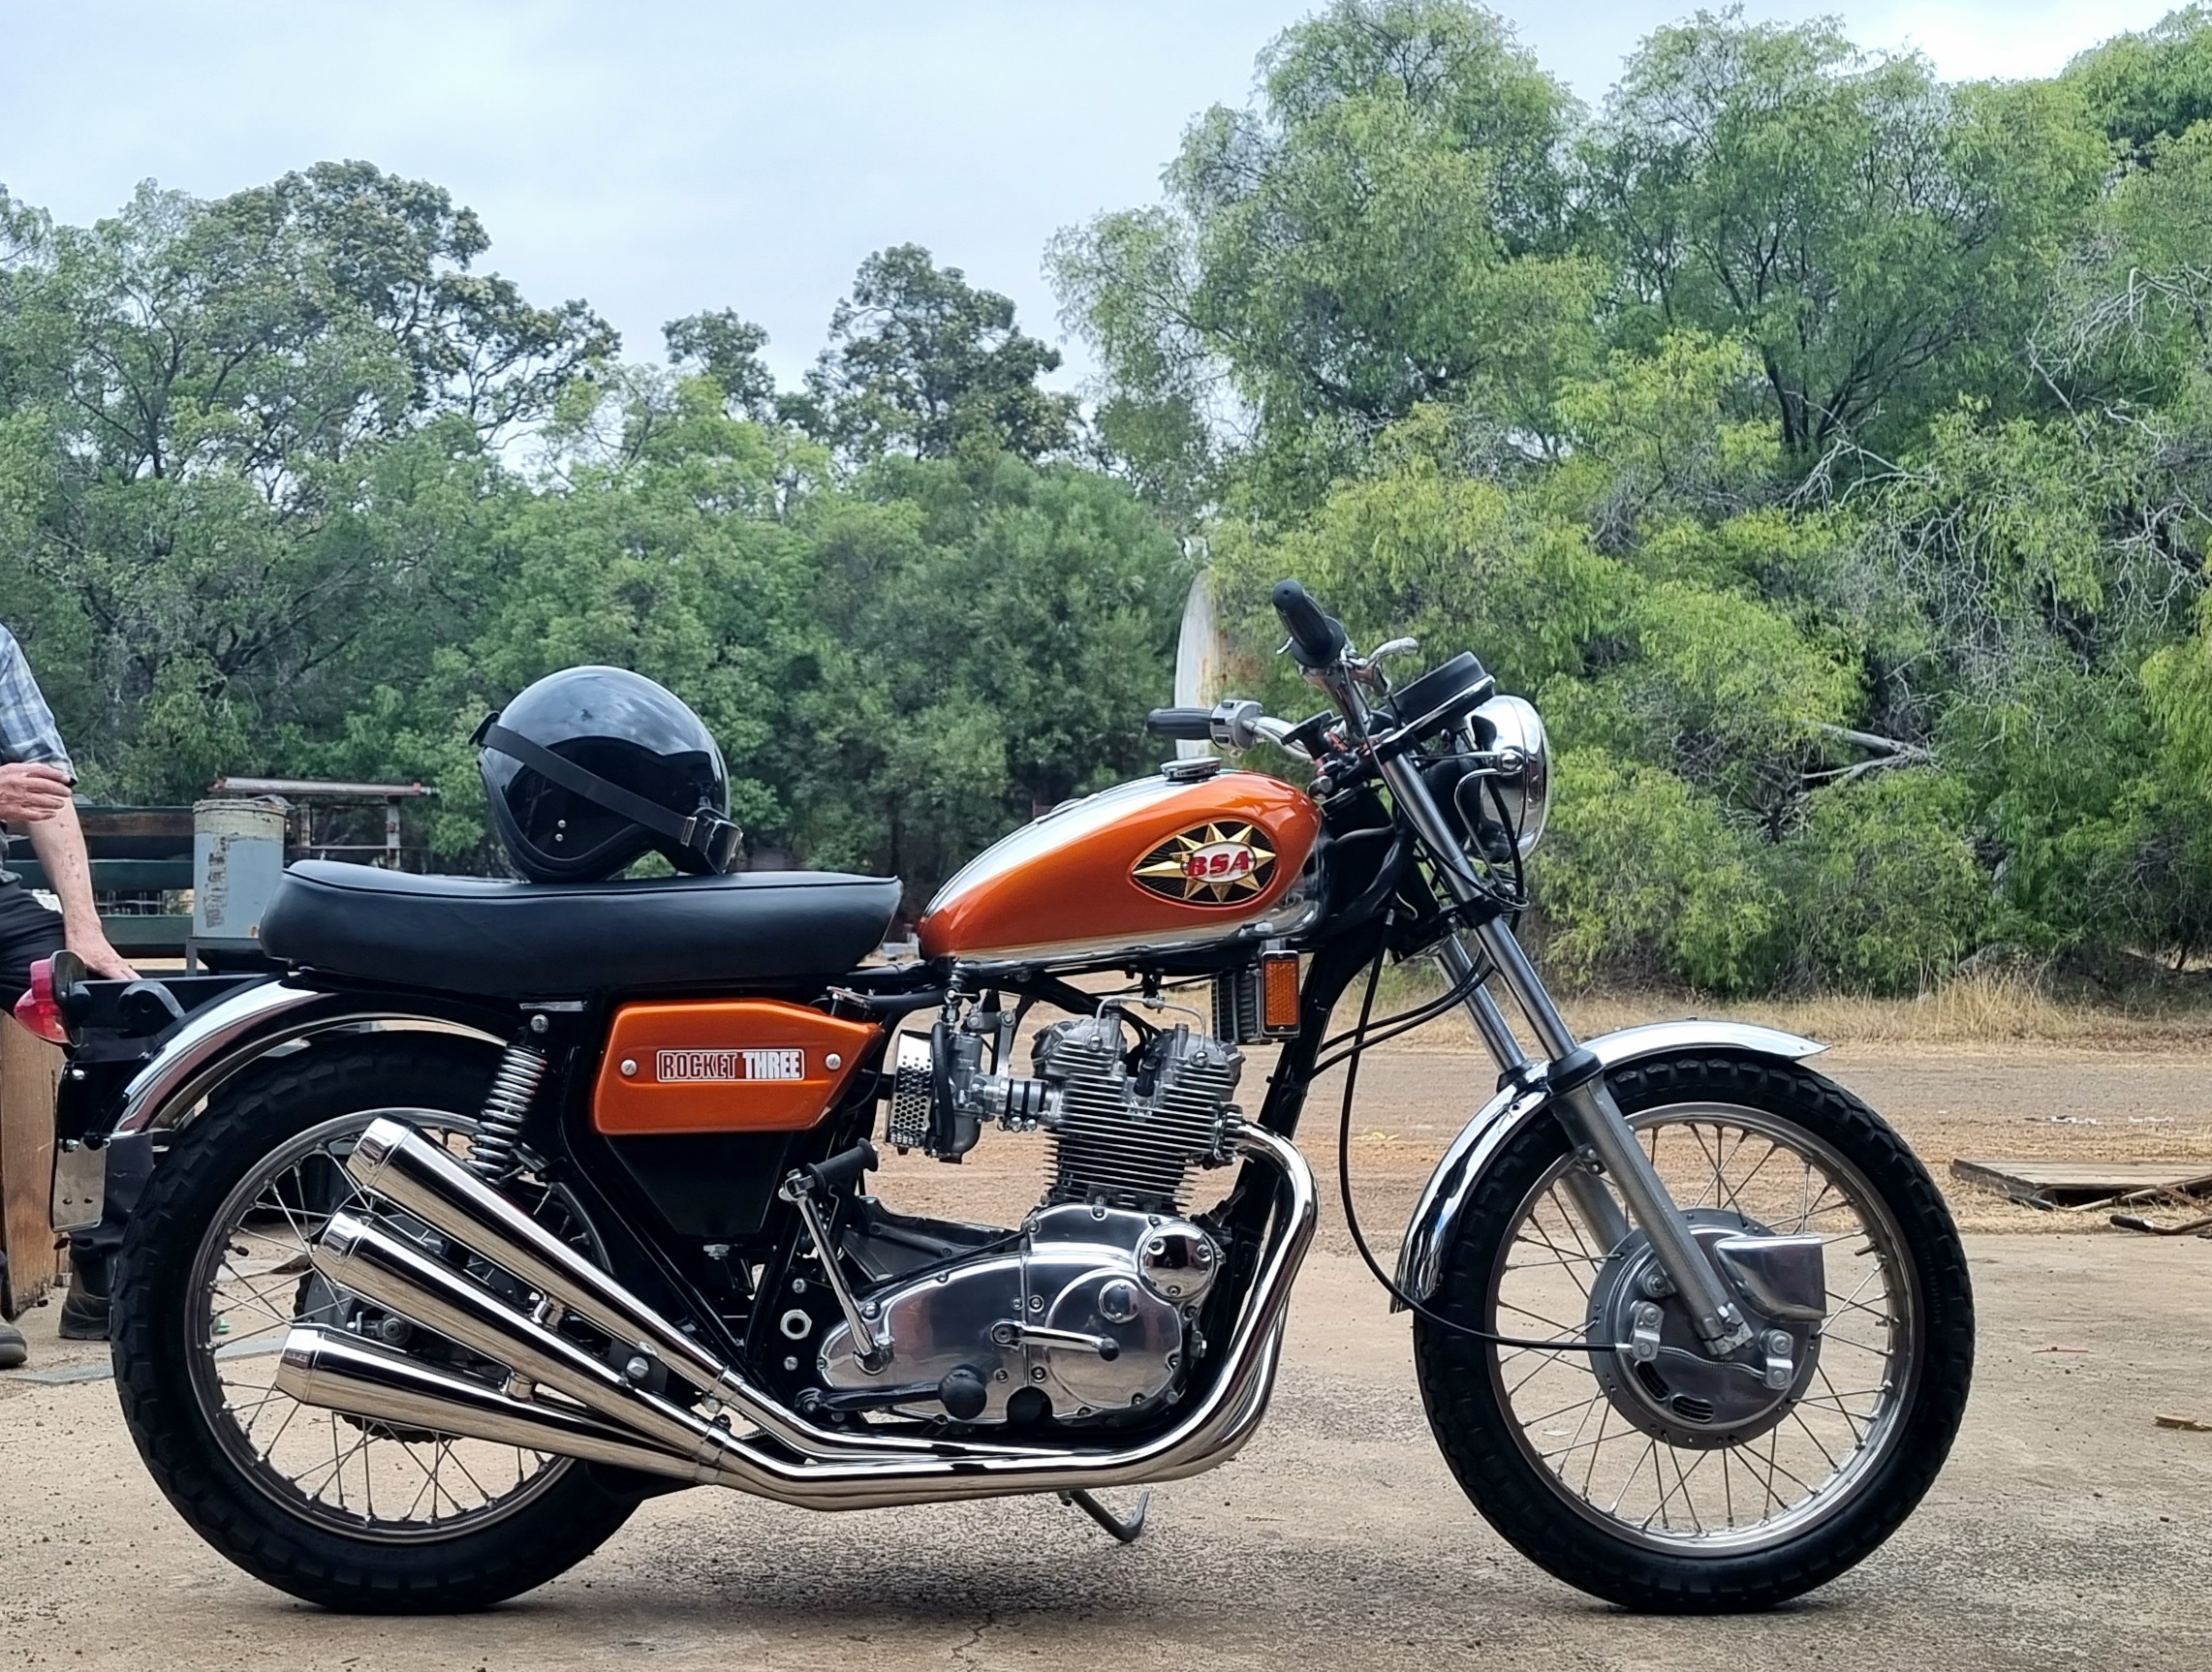
So, there you have it. Everything old is new again. Ariel’s attempt at post-modernism didn’t really work for me (nor did BSA/Triumphs for that matter), so I’ve taken the machine back to its roots. There is another longer story out there about the Ogle-designed Triumph Trident and BSA Rocket 3 of 1969. They were fine machines but, in terms of sales, they flopped. The Americans were having none of it and BSA/Triumph were forced to revert back to the more traditional lines and classic fuel tank in what became colloquially known as ‘export’ models. I’m sure, had Ariel remained liquid, they would have done the same thing. In this case I’ve done it for them, successfully – if I may be so bold.
Now, I must go and sift through my slides for one of a Frau and her quirky little French car.
Aside from stainless steel, regular items look new again with a good coat of cadmium.
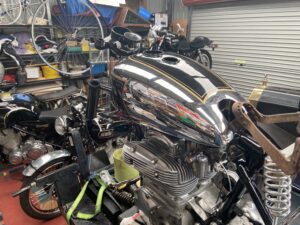
Paint, powder-coat, chrome and cadmium. Everything is either painted, polished or plated.

Back home and ready to go back onto the Ariel.
Rewards in stripping off a bit of paint are evident.

Top read – can’t beat a love story about motorcycles re: labour of love and the German Lass????
Very intelligent approach to variations on main themes. A front twin leading shoe hub as I had on Ken Alvey’s favourite1948 Square four would be an added safety buffer if I were the rider, as the Vincent lads have found over time. Love the filtration and pump upgrades and the finer front guard over the heavier series 1 machines. Rear suspension is set with an eye for balance. Mine always looked a little ” URAL” like until it was mounted. Hopefully I can send you a photo, as I’ve sent you an enquiry via bikesales. Best Regards. DWJ
Words fail me, bloody top job, a REAL restoration. Well done.